Recording UTI and lips
The recording studio
Recordings took place in a purpose-built UTI recording studio at the Clinical Audiology, Speech and Language Research Centre, Queen Margaret University, Edinburgh. A high-speed Sonix RP ultrasound machine was used with automatic audio-ultrasound synchronization, recording at 121 frames per second.
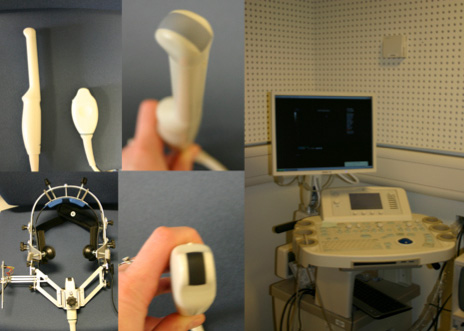
Figure 1: Long and short-handled microconvex probes;
a probe fitted in the stabilising headset;
the high-speed Sonix RP ultrasound machine
All noisemaking equipment such as the ultrasound machine and PC CPU were in a room adjacent to the one where the recordings were made. Articulate Assistant Advanced (AAA) software version 2.16.12 was used to record simultaneous audio and UTI. A short-handled microconvex probe set to an angle of 150° was used, fitted to a stabilising headset, worn by participants (see figure 1). Orthographic stimuli were presented to the speakers via a monitor. Audio recordings were made using an Audio Technica directional clip-on microphone clipped to the side of the ultrasound headset.
The stabilizing headset
The ultrasound tongue imaging headset is designed and built by Articulate Instruments. It is made of lightweight aluminium and weighs under 1Kg. The headset has thirteen adjustable sections, including a quick-release headstrap, that allow it to be fitted to different sized heads. The probe is held in place underneath the headset and should be aligned with the midline of the chin in sagittal view. The probe’s sagittal angle can be altered to focus on different sections of the midsagittal tongue. e.g. the root, or the tip and blade.
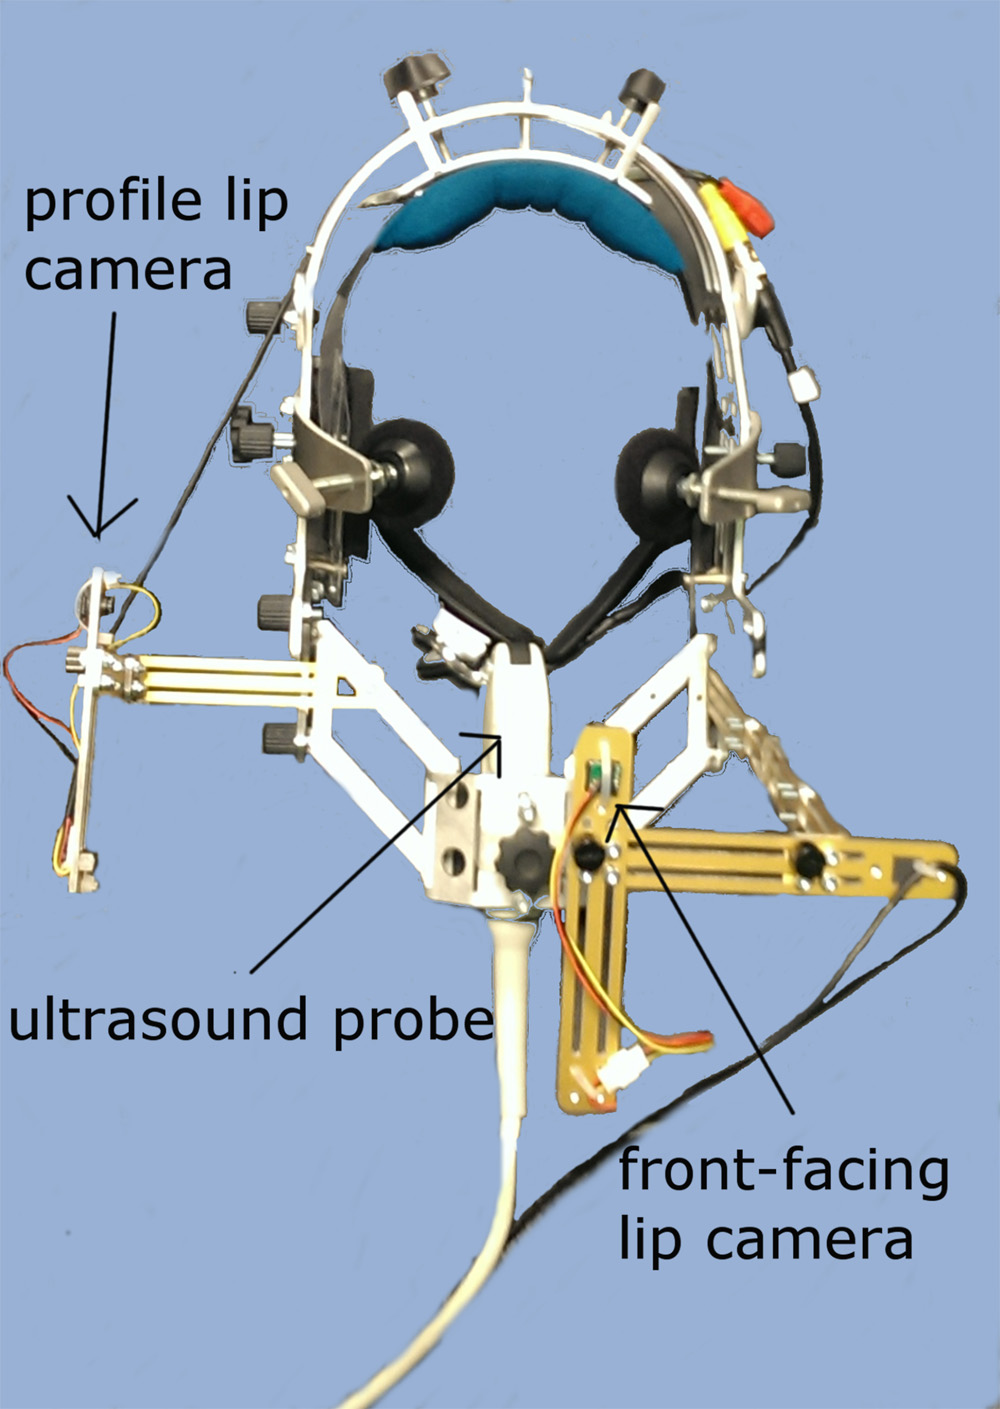
Figure 2: The stablilizing headset with mounted micro-cameras
Methods to improve UTI interpretation
Palate trace
The hard and soft palate can be made visible during a UTI recording by pressing the tongue against the palate and swallowing. Although swallowing liquid can reveal the hard palate, a strong swallowing action (e.g. due to a large mouthful of liquid) can result in the chin pushing against the ultrasound probe, causing it to move relative to its position during speech, even with headset stabilization; therefore a subtle swallowing action is preferable for obtaining a palate trace. The hard and soft palate become visible over successive UTI video frames as the liquid is swallowed. Articulate Assistant Advanced software can be used to fit a spline, a manipulable curved line, to the surface of the hard palate and alveolar ridge as they become visible (see Figures 3 and 4). This palate spline can then be copied onto other video frames to provide a static reference point allowing easier interpretation of tongue location. We do not usually extend the palate spline to the mobile soft palate, as the position of the soft palate varies during swallowing and during different types of speech sounds as it raises and lowers.
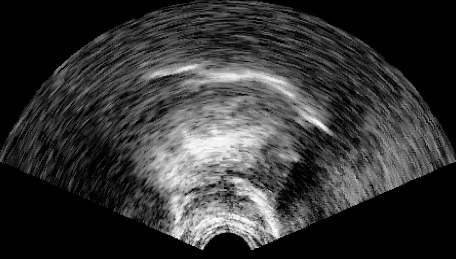
Figure 3: The tongue pressed against the hard palate and alveolar ridge, revealing the outline of the palate
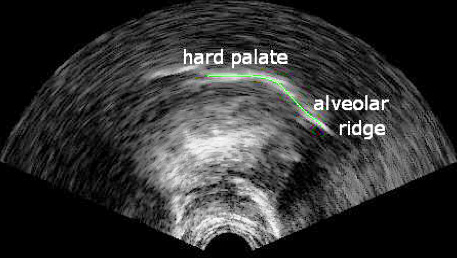
Figure 4: A spline, manually fitted to the palate and alveolar ridge
Bite plane trace
Another tool that improves our ability to interpret and compare UTI recordings is the bite plane trace. A quasi-horizontal trace of the occlusal plane can be achieved using a plastic bite plate.
The bite plate is made from 2mm thick medical grade plastic and vacuum-molded around a standard template 95x40mm (see Figure 5). When the bite plate is placed in the mouth, a vertical ridge, which is 8mm high and located near the middle of the bite plate, rests against the front of the upper incisors, while the area of the bite plate behind the ridge is gripped between the incisors, premolars and molars. The distance between the raised section and the posterior end of the bite plate is 45mm, although the bite plate can be trimmed for speakers with smaller mouths. Likewise, larger bite plates can be created for speakers with larger mouths.
Using the bite plate
Informants are asked to press their tongue against the underside of the bite plate, so that their tongue bulges upwards at back edge of the bite plate (see Figure 7). The point at which the tongue surface bulges upwards will be a fixed distance (e.g. 45mm) from the biting edge of the incisors. The flat surface of the tongue pressed against the bite plate allows the identification of a quasi-horizontal plane in the video image. A reference spline can be fitted to this plane and used to rotate all subsequent splines to a quasi-horizontal position to improve interpretation of tongue posture and to allow better comparison between recordings from the same speaker in different sessions, or different speakers. Another option is to alter the ultrasound probe orientation while the bite plate is in place, by adjusting the angle of the probe using the stabilizing headset, so that the bite plane surface is parallel to the top and bottom of the video frame. The latter technique was employed for all of the recordings made for this website.
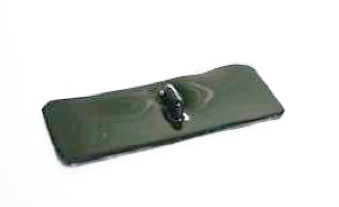
Figure 5: The plastic bite plate
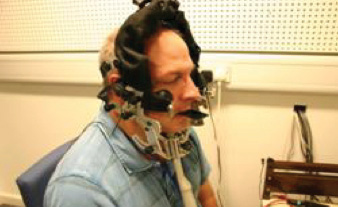
Figure 6: The bite plate inserted in the mouth
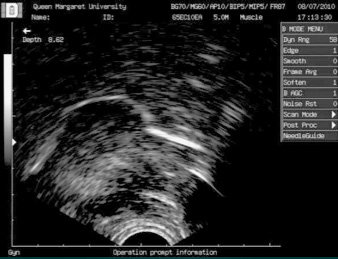
Figure 7: UTI frame showing the tongue pressed against the bite plate

Figure 8: A spline fitted to the tongue surface pressed against the bite plate
The video below shows an ultrasound image of the tongue during probe angle adjustment. It shows a sequence in which the participant swallows to show the outline of the hard palate, then inserts the bite plate into their mouth.
The lower part of the headset is then adjusted in the direction of the white arrow in Figure 9 in order to change the angle of the probe relative to the chin, so that the bite plane is parallel to the upper and lower edges of the video screen. At the end of the video, the participant swallows again to reveal the palate.
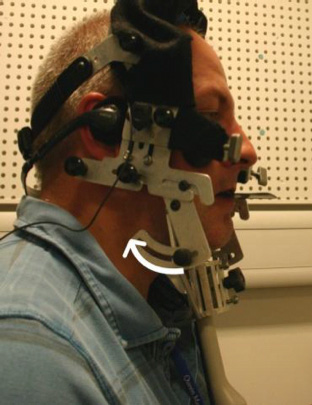
Figure 9: Speaker with the stabilizing headset on and the bite plate in their mouth
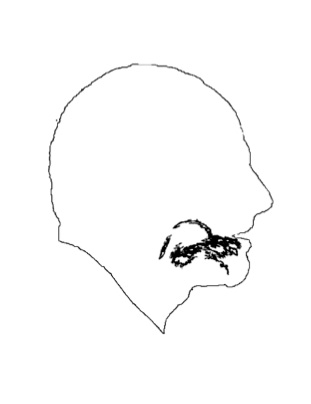
Figure 10: A profile silhouette with superimposed UTI image of the tongue pressing against the bite plate
Creating the ultrasound videos
Video and acoustic signal synchronization
High-speed ultrasound
The recordings made for this website were made using an Ultrasonix high-speed ultrasound machine. Very precise synchronization of audio and video recordings can be achieved with this machine, which generates a synchronizing signal the instant that each full ultrasound scan is completed. This synchronizing signal is received by the same soundcard that receives the audio signal; therefore Articulate Assistant Advanced (AAA) software is able to use the synchronization signal to assign each and every complete scan image to the exact timepoint (<1ms tolerance) on the audio recording that it was completed.
Creating ultrasound videos
The videos used in this resource are MP4 format. AAA allows export of UTI video and audio along with a static palate spline overlay, included as a reference point. Videos were also exported at normal and half-speed, with audio automatically adjusted in the half-speed format videos to avoid pitch lowering that is typical when audio recordings are slowed down. In some cases frame-rate adjustment of the videos was required and was carried out using VirtualDub 1.9.11.
Low-speed ultrasound (post-hoc synchronization)
This section is not directly relevant to videos and analysis presented on this site, where a high-speed ultrasound machine was used for recording, but provides information that may be useful regarding recordings made with other types of ultrasound machines that have a video output and where synchronizing audio and video can be more complicated.
Ultrasound machines with video outputs
Synchronization for other types of ultrasound machine with PAL/NTSC video outputs (see below) is more complex. NTSC is always used in preference to PAL because it has a higher frame rate. A frame grabber card and separate audio recording device (e.g. sound card) is the preferred approach for the following reasons. Although the broadcast standard NTSC frame rate is 29.97fps, NTSC output from an ultrasound machine can vary from the standard by as much as 2%. Video cards that include an audio channel are only designed to synchronize within perceptual limits of about 40ms. Often they will compress the video output in a way that makes it impossible to de-interlace (see de-interlacing below).
Generating an audio/video synchronization signal
In order to bring the separate audio and video channels into line, a signal is needed to synchronize the audio and video in a post processing operation. We need two things for accurate synchronisation. (1) A marker that can be seen on the video and detected on the audio (2) An accurate estimate of the video frame rate with reference to the audio channel. One solution is an electronic unit (SyncBrightUp unit, see figure 10) that places a simultaneous flash on the video and a tone on the audio channel in response to a trigger signal. The unit also places several pulses on the audio channel at the instant that each interlaced scan is completed, so providing a means to measure the video frame rate.
Initially, each incoming video frame recorded by AAA is assigned a time stamp determined by the instant it was read in by the software. This results in sequence of video frames with an irregular period.
In a post-processing stage, AAA software detects the tone and pulse sequence of the synchronization signal and the frame rate and alignment offset can be calculated and applied to each recording in order to achieve automatic re-synchronization.
The video output from the ultrasound machine and audio output from the microphone, are fed through the SynchBrightUp unit (see Figure 11).
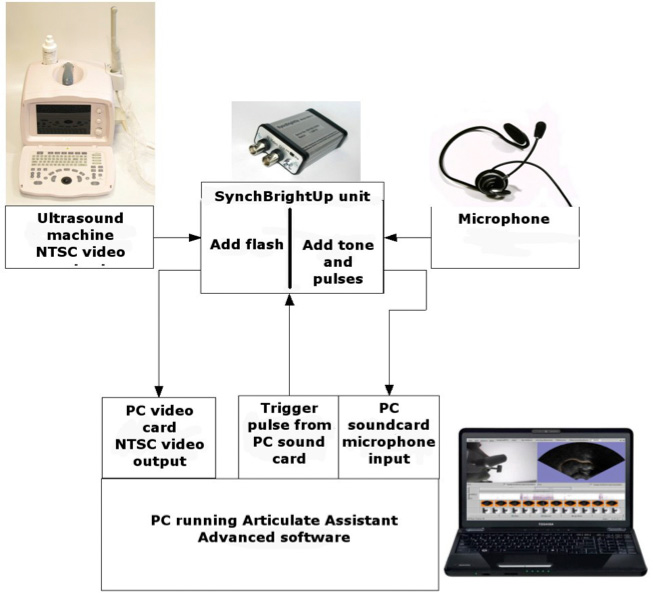
Figure 11: Diagram of the video and audio capture set up
where an NTSC- output ultrasound machine is used
Ultrasound machine processing delay
Even if we align the ultrasound video output with the audio using the SyncBrightUp described above, this does not ensure that the image sequence is correctly aligned with the audio; there may be an internal video processing delay associated with particular ultrasound machines due to the independence of the rate at which ultrasound sweeps are completed and the rate at which video frames are created. Even after deinterlacing, video stills may be composites of several ultrasound scans from sequential time periods. If the tongue is moving rapidly, this could give rise to discontinuities in the surface of the tongue. The best way to reduce this effect is to keep the ultrasound sweep rate as high as possible, ideally at 100Hz or above. If the ultrasound sweep rate is less than 50Hz then when the tongue moves, the tongue-surface shape will be distorted and discontinuities will be readily apparent. In addition, it is necessary to calculate the internal processing delay of the individual ultrasound machine and adjust the video in relation to the audio accordingly.
References
Wrench, A. A. & Scobbie, J. M. (2006) "Spatio-temporal inaccuracies of video-based ultrasound images of the tongue", Proceedings of the 7th International Seminar on Speech Production, Ubatuba, Brazil, December 2006